Thursday, August 30, 2018

DIY Memory Box


I made this for my boyfriend for his birthday.  It is a memory box that contains a bunch of memorable items and photos/photo stickers.  The box was originally just a wooden box but I added legs to it and painted it black.  The golden rims and embellishments are made out of glue using a low temp hot glue gun.  The glue I used was gold but I coated with it a gold paint to give it a more elegant look.


Wednesday, February 14, 2018

Fruits Collection 2017 photobook

My boyfriend gives me an orange everyday that has a different drawing in it so I've taken pictures of all the oranges and occasional other fruit and compiled into a photobook using shutterfly.  I can't take much credit for this one though since all of the creativity comes from his orange drawings ๐Ÿ˜…


Saturday, April 15, 2017

DIY Bottle Cap Magnets


I made this for my boyfriend and his brother for his brother's birthday. (They're both huge Bills fans ๐Ÿ˜…๐Ÿˆ Go Bills!)

I printed pictures as 1 inch circles and cut them out manually, glued them in with mod podge, decorated the pictures with glitter, floating charms, rhinestones etc, sealed with a layer of resin, and added a small magnet on the back.

Looking back, I should have sealed the pictures before I put the resin in to prevent the pictures from getting darker or having a "wet look" due to the resin.  Lesson learned.  The banner that I attached the bottle cap magnets to were wooden banners that I painted and decorated with scrapbook paper and stickers.  I glued small magnets to the banner so that the bottle cap magnets stayed in place but they are easily detachable so you can attach it to whatever magnetic surface you have.

Tuesday, March 14, 2017

DIY Bathbombs


 I made 16 different bathbombs for my boyfriend for White Day! (in Japan, Valentine's Day is a day when the girl gives chocolate to the guys and White Day is the day when guys returns a gift to the girl - although I didn't exactly follow that ๐Ÿ˜…)


I got some essential oils, citric acid, baking soda, food coloring and made up my own combinations as I went.  My boyfriend loved it! 


I also decorated the wooden tray that I put all the bathbombs in.  Simple paint job with some stickers, scrapbook paper on the inside, and finished it with some varnish.


 I hid pretty stones and imitation gems in each of the bathbombs so when he uses them, he gets a little surprise in his bath. ๐Ÿ’•


Tuesday, August 30, 2016

DIY Notes to Brighten Your Day


Glass light bulb with small, rolled up notes that I wrote out for my boyfriend for his birthday.  I added charms on the bottle to add a nice little touch.


I wrote down various compliments in each note and decorated each one differently.  The notes are rolled up and held in place by a jump ring so they stay rolled up while in the light bulb.


I even wrote one of the notes in code so good luck to him when he tries to figure it out!  I don't really remember what the message written in code was so hopefully he can figure it out...

DIY Liquor-filled Chocolate Bottles


I made this for my boyfriend for his Birthday ๐Ÿ˜๐Ÿ’•. You can add spices, dried fruit bits, etc. (get creative!) to the chocolate to create a chocolate bottle to match your choice of liquor.  

I made 3 different kinds:
1) Coconut bittersweet chocolate filled with coconut rum
2) Mango dark chocolate filled with mango rum
3) Spiced maple white chocolate filled with vanilla rum

The steps on how I made them is below:

What you'll need:
  • Disposable plastic sauce bottles (available at Asian markets)
  • Water
  • Toothpicks
  • Disposable transfer pipettes
  • Styrofoam plate (optional)
  • Chocolate - your choice
  • Liquor - your choice (I used different kinds of rum)
  • Candy wrapper foil
Steps:
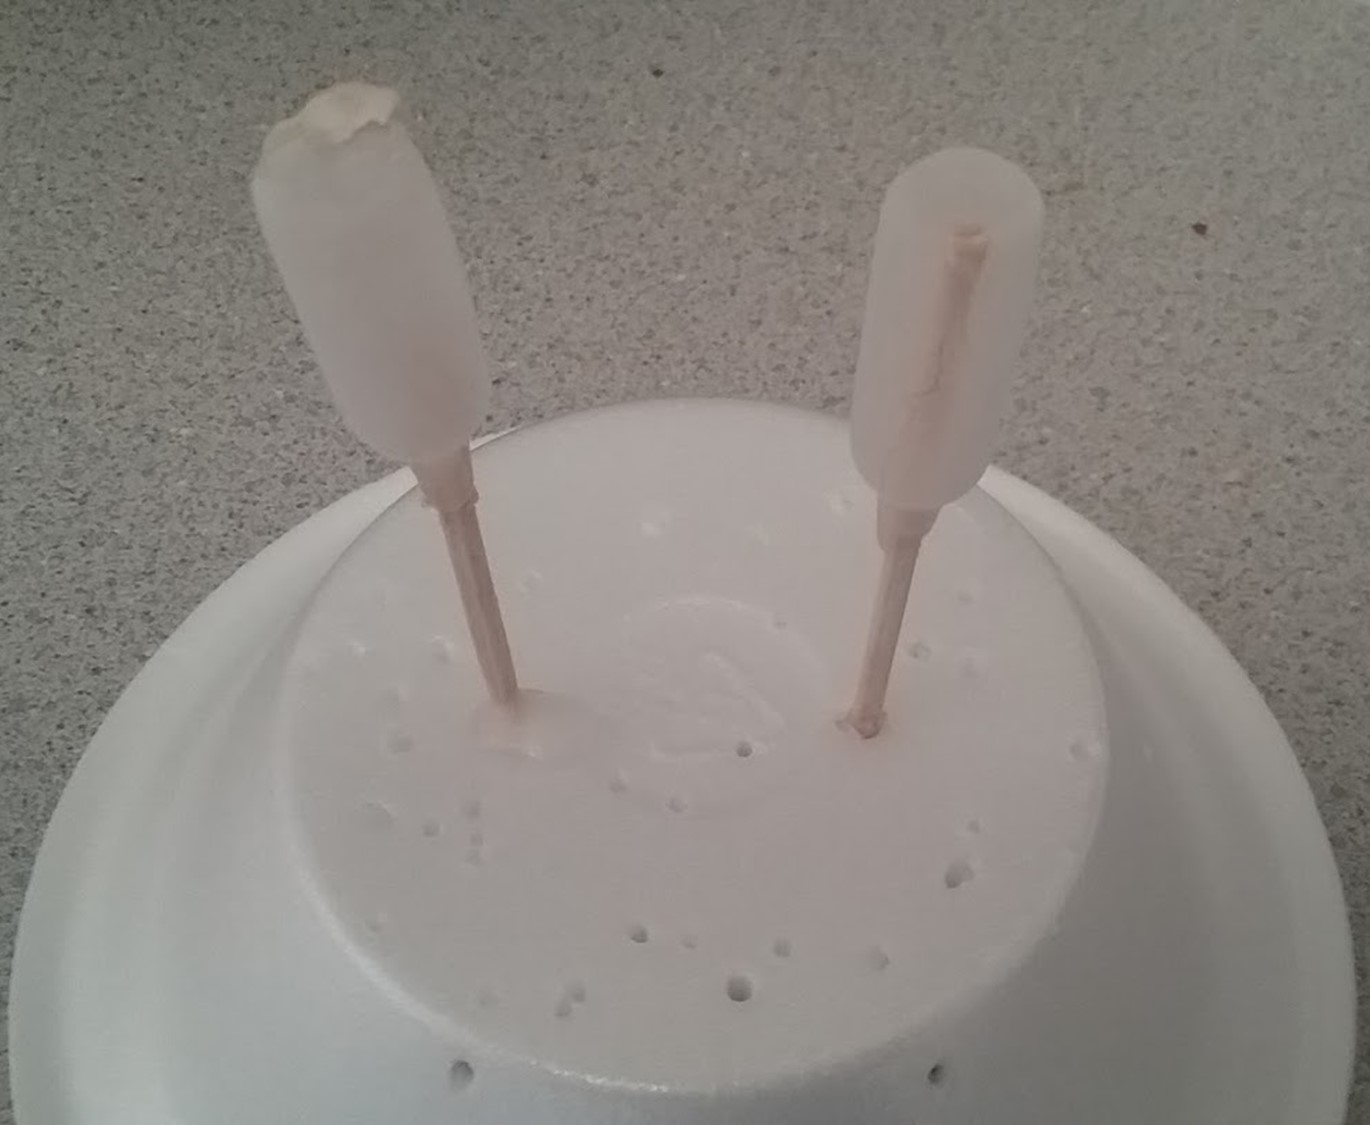
  1. Remove caps from the sauce bottles, fill with water, place a toothpick in it and place in the freezer.
  2. Once frozen, cut the plastic sauce bottles off the ice.  The Styrofoam plate is useful to stand the frozen bottle-shaped ice (keep in freezer after cutting each bottle to ensure that it doesn't melt)
  3. Keep the frozen bottle-shaped ice in the freezer while melting your choice of chocolate.  You can add spices, dried fruit bits, etc. at this point to the chocolate if you would like.
  4. Cool the chocolate until it is at room temperature.  It should still have a flowing consistency.
  5. Dip the bottle-shaped ice into the chocolate and cover all surfaces and let stand upside down in the refrigerator (you can just stab the Styrofoam plate with the toothpick end).  The ice will melt, leaving a solid hollow chocolate bottle
  6. Remove the toothpick from the chocolate bottle and fill the chocolate bottles with your liquor of choice using a disposable transfer pipette
  7. Cover the bottle opening with melted chocolate and let it cool in the fridge.
  8. Wrap the foil around the liquor-filled chocolate bottle
Enjoy!


Thursday, June 30, 2016

DIY 5-Leaf Clover Wallet Inserts


I find 4-leaf clovers often without actually ever looking for them but finding a 5-leaf clover is a rare occasion for me and I found two of them within 5 days of each other!  Naturally I pressed them and turned them into wallet inserts so now my boyfriend and I both have one! ๐Ÿ˜‰๐Ÿ€

I pressed the clovers for a few hours and used a combination of different types of scrapbook paper and stickers to decorate the insert.  The "lamination" was actually done with clear, heavy-duty packing tape on both sides of the insert. (cheap and it works!)

DIY Resin Coasters

These are resin coasters I made for my mother using stickers that she got me years ago that I recently found. I did 2 layers of res...